The MSI motherboard BIOS controls the boot process while your computer boots up. The process is known as POST or Power On Self Test, in this process the BIOS controlling unit will check for CPU, RAM, POWER, and other device attachments such as Mouse, Keyboard, Printer, and joysticks. When the system is unable to boot to the Windows OS, it is considered as the boot failure or the BIOS is unable to detect the boot device and your computer won’t be able to POST, the first thing you should check is the BIOS Settings on your Computer. This way you can ensure that all the devices are connected correctly and there is no hardware failure.
MSI is a well-known name in the Motherboards market. The company has been around for more than 20 years. They offer all sorts of products from Laptops and desktops to High-end Graphics cards, Motherboards, and Monitors. MSI Motherboard is a well-known motherboard among gamers. It offers high-end performance and Superb build quality. Their products are specially designed for games and you will find almost every gaming-related product on their official website.
Below we are writing a detailed guide for you to easily access the BIOS settings on MSI Motherboard.
How to get to MSI Motherboard’s BIOS Settings
There are two methods to enter into the MSI BIOS settings. The first method is for people who have not set the password while the second one will teach you to enter the MSI BIOS settings with a password.
How to Enter MSI BIOS with No Password
Step 1
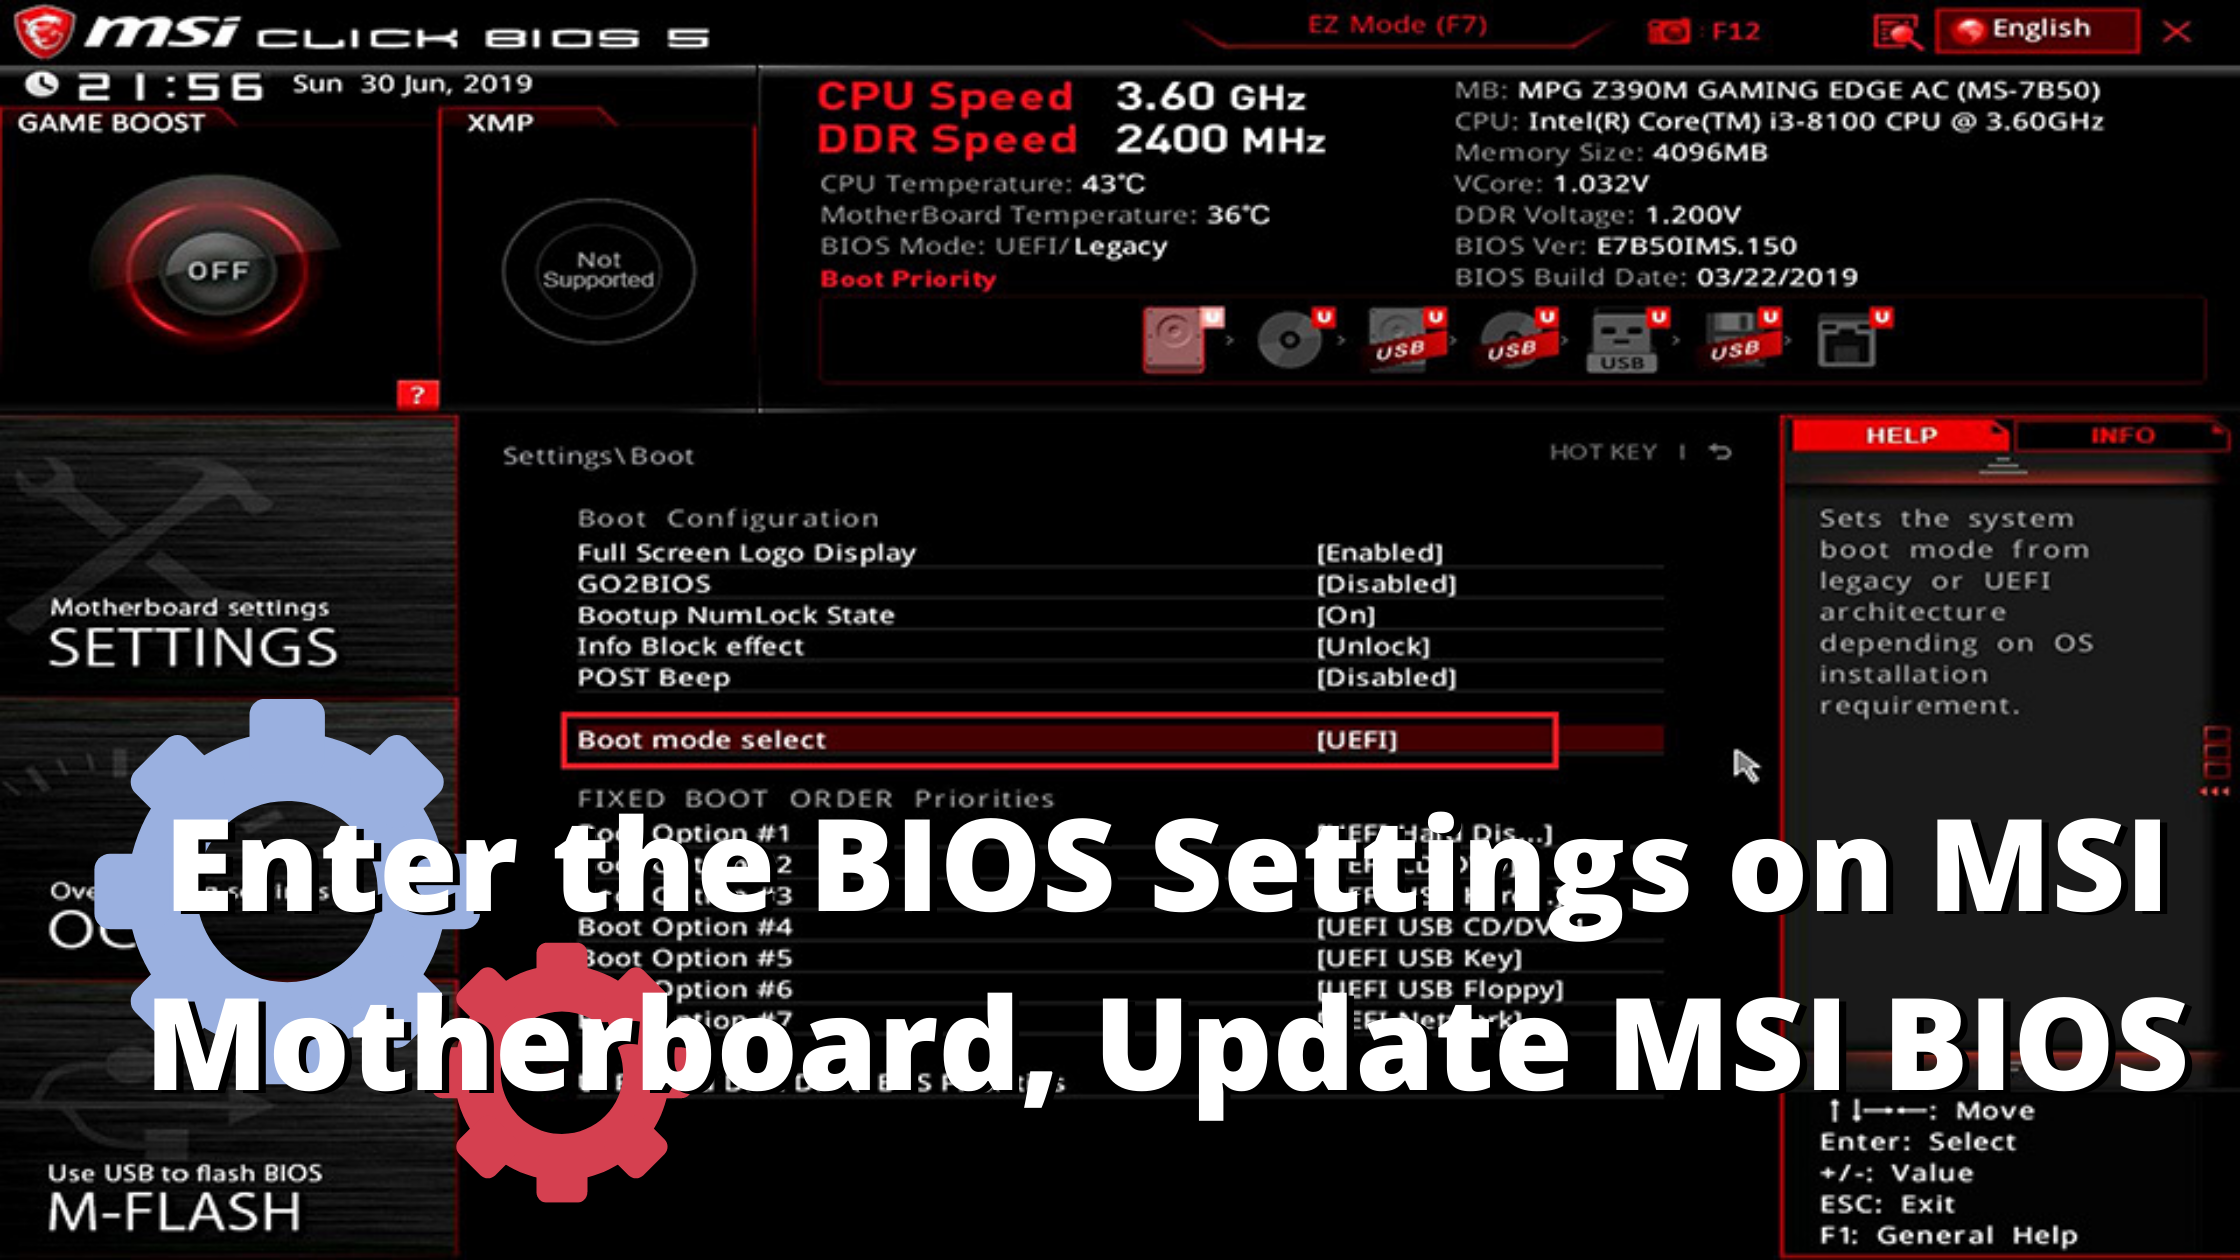
Restart your computer and press the “DEL” key while the system is booting up to enter the BIOS Settings on the MSI Motherboard. In some cases, you need to use the F2 key instead of the DEL key to enter the BIOS setup.
You have to make this process as quick as possible as Windows 10 has a good boot-up speed because of which you might miss your chance of entering the BIOS settings. If the process is successful, the Computer will blink and restart again to enter into the BIOS Setting to perform POST. If you see an MSI Logo appearing on your screen then press the “Tab” key on your keyboard to enter the MSI BIOS Setting.
Step 2
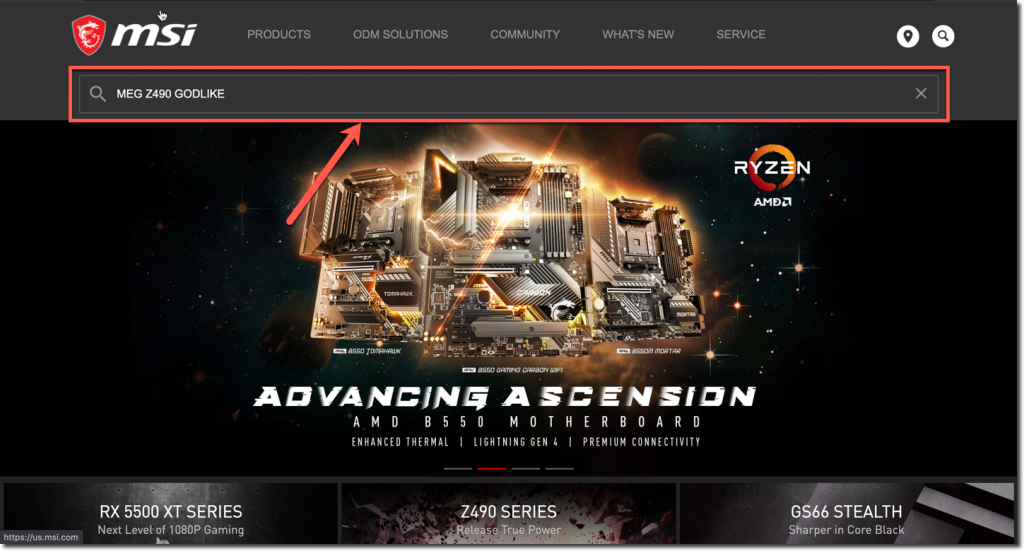
Visit MSI.com and enter the model name in the search box given at the top-right corner. for example, if you are using the MEG Z490 GODLIKE motherboard then type “MEG Z490 GODLIKE” without quotes and hit enter.
Step 3
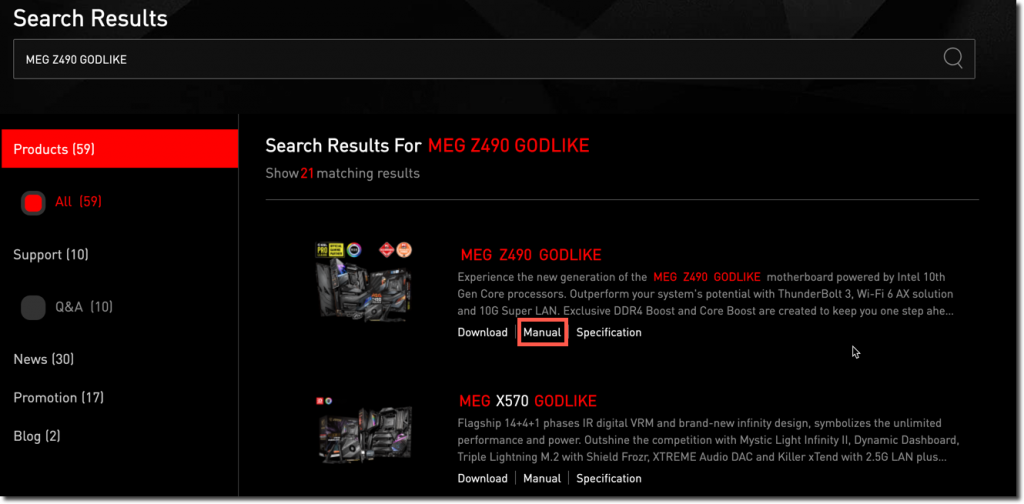
Click on the Manual button below the product description. On the next screen, select your preferred language and download the Manual on your Computer.
Step 4
Follow the instructions given in the manual to make your changes. Once done, click on the Save Changes and Exit button on the bios screen to exit it.
How to Enter MSI BIOS which has Password
Setting up an administrative password will not only secure your Computer but will also help you to Lock your BIOS screen and restrict anyone from entering it. However, if you are struggling to enter the BIOS setup which has Password enabled, follow these steps
Step 1
Restart your computer and press the DEL key as the system is booting up to enter the MSI BIOS settings. Sometimes, you might have to use the F2 key to enter the BIOS Setup.
If you see the MSI Logo appearing on your screen, press the tab key and then press the DEL Key.
Step 2
It will ask you to Enter the Password. Put your Administrator password and hit the “Enter Key” to open MSI BIOS Settings for password enabled system. If the password is incorrect, the system will notify you about it, Try entering the correct password to enter successfully.
Step 3
Visit the official website of msi.com and enter your product name in the search box. Click on the manual button below the product description on the search results page. On the following window, select the manual language and download it on your computer. Follow the instructions given in the manual to successfully apply the changes.
Step 4
Finally, hit the Save Changes and Exit button and enter into your Windows Operating system to check if the changes are applied.
How to Update MSI Motherboard BIOS
If you are facing any glitches or errors while operating the MSI motherboard then it is recommended to update the BIOS on your MSI Motherboard to the latest version. This will ensure that all the previous bugs and errors are fixed and it will also provide you with the latest security patch.
The process of updating the MSI motherboard BIOS is pretty simple and just requires a few steps. However, for a newbie, it might not be an easy task and thus this guide is your savior. Please follow the steps given below to successfully update the BIOS on your MSI motherboard.
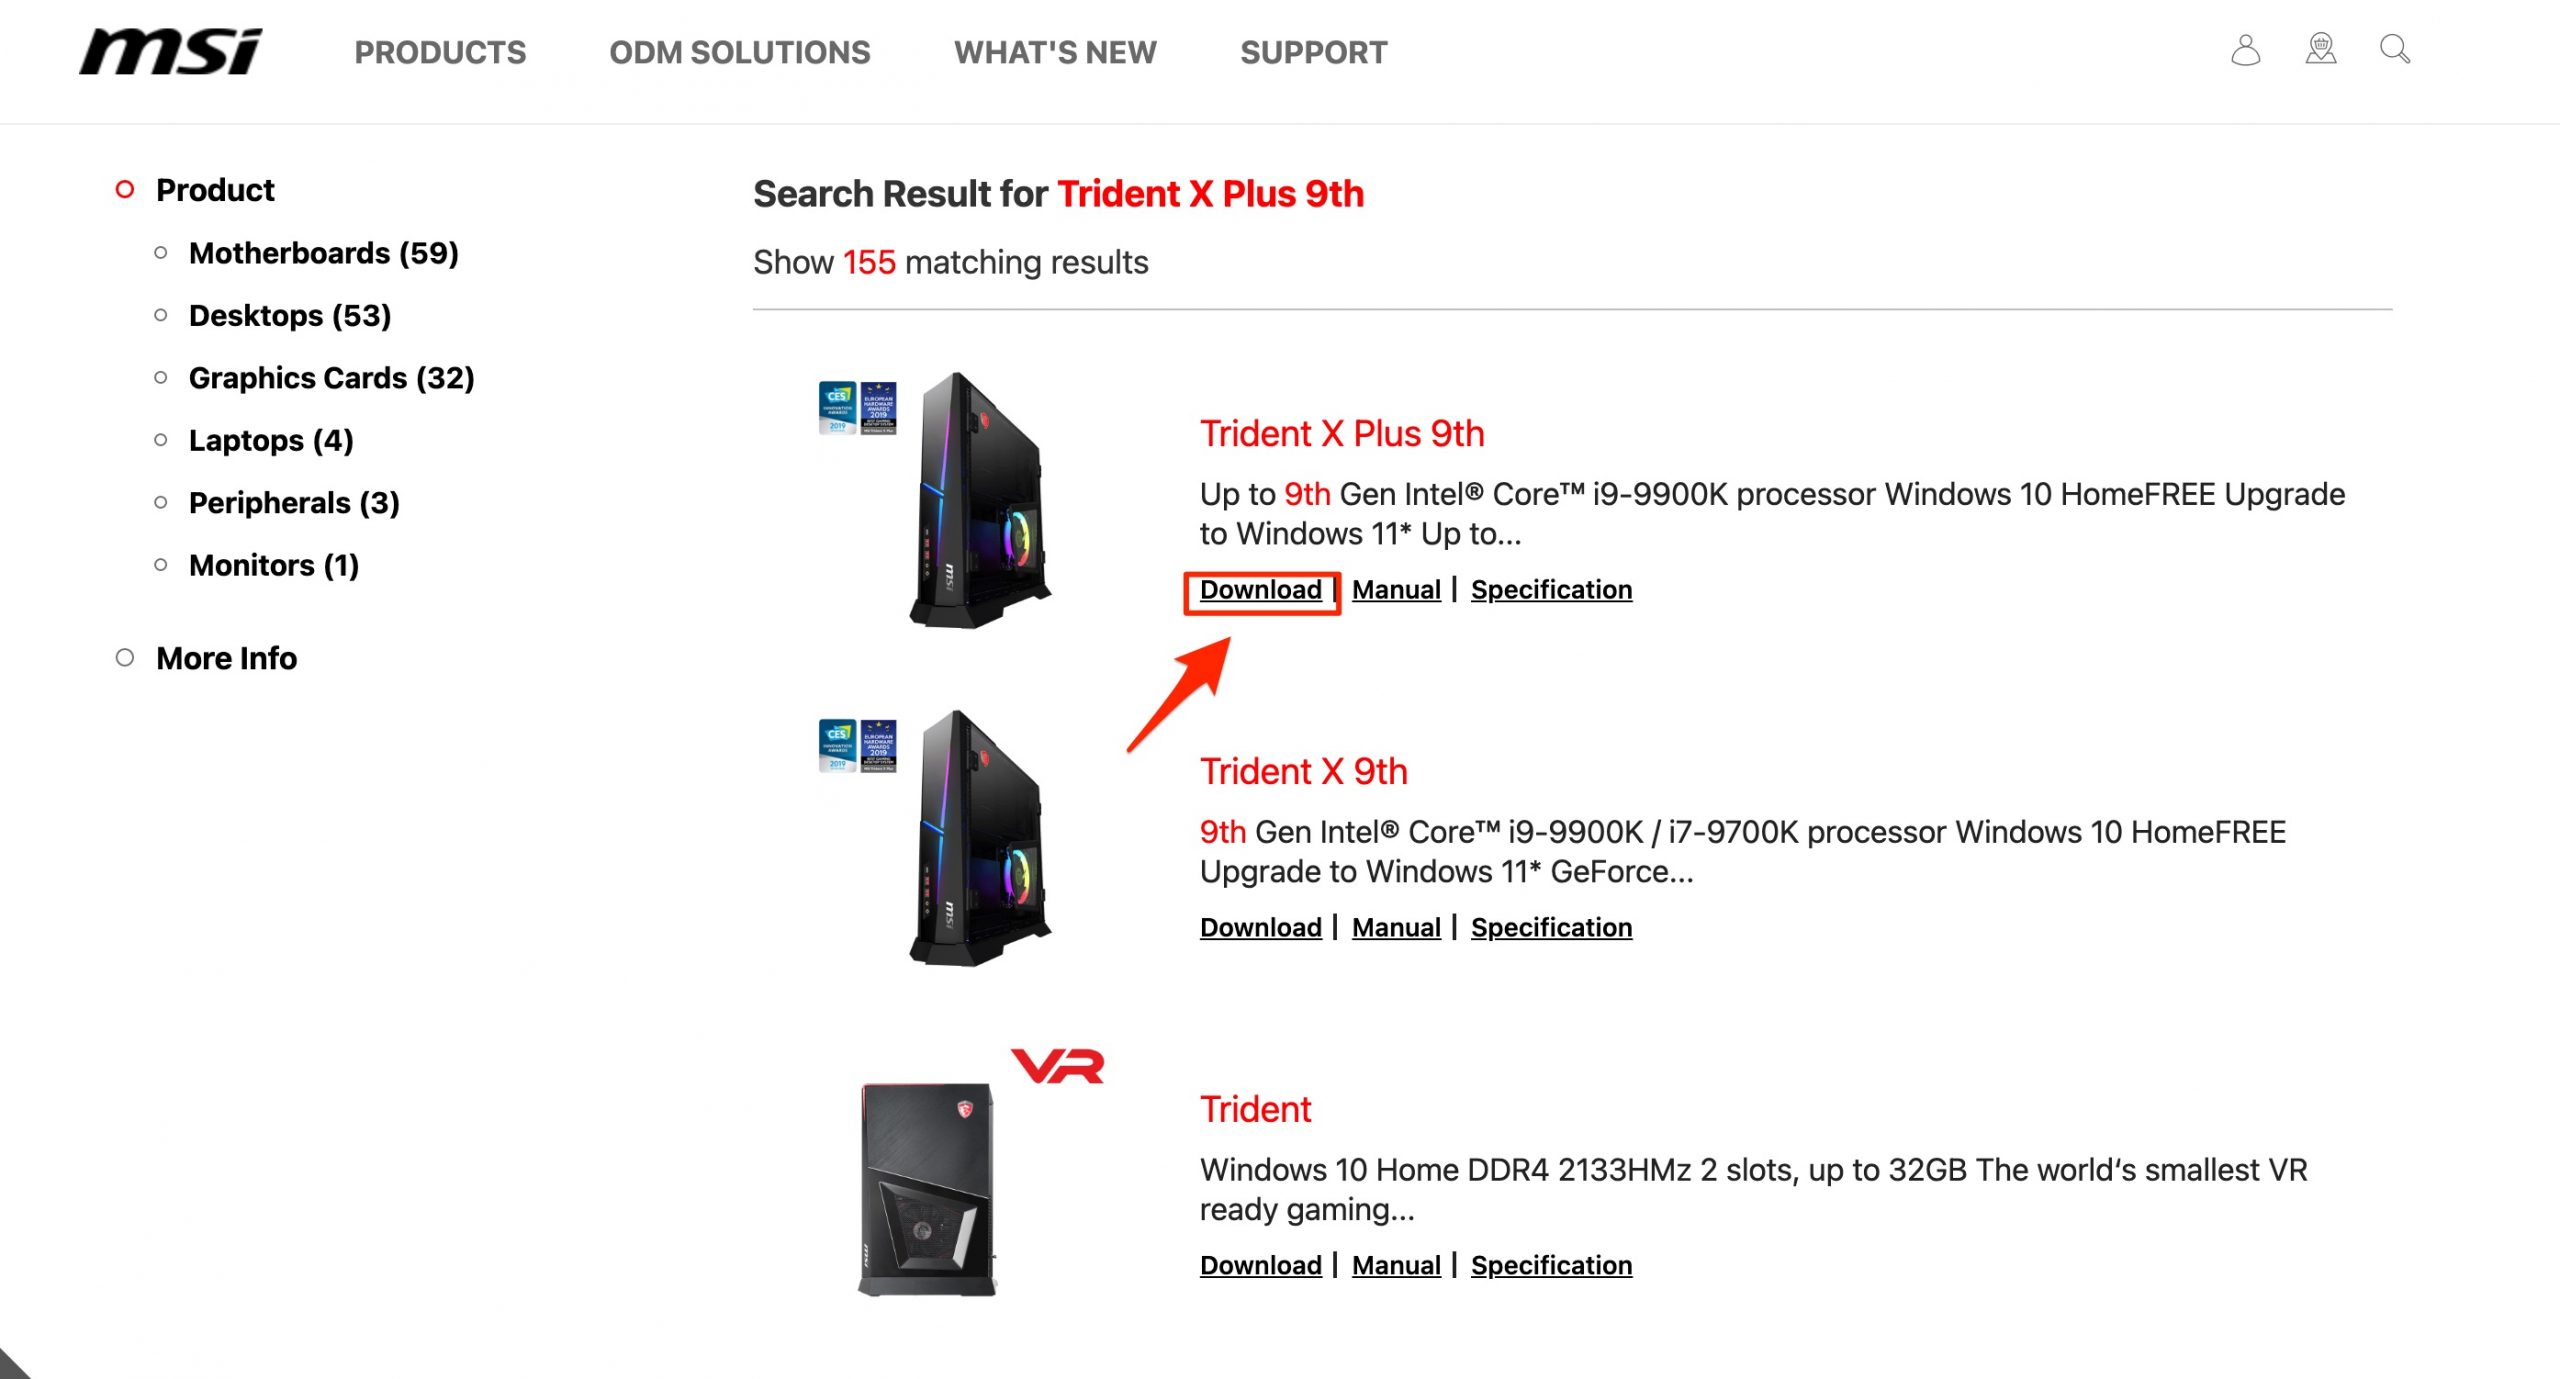
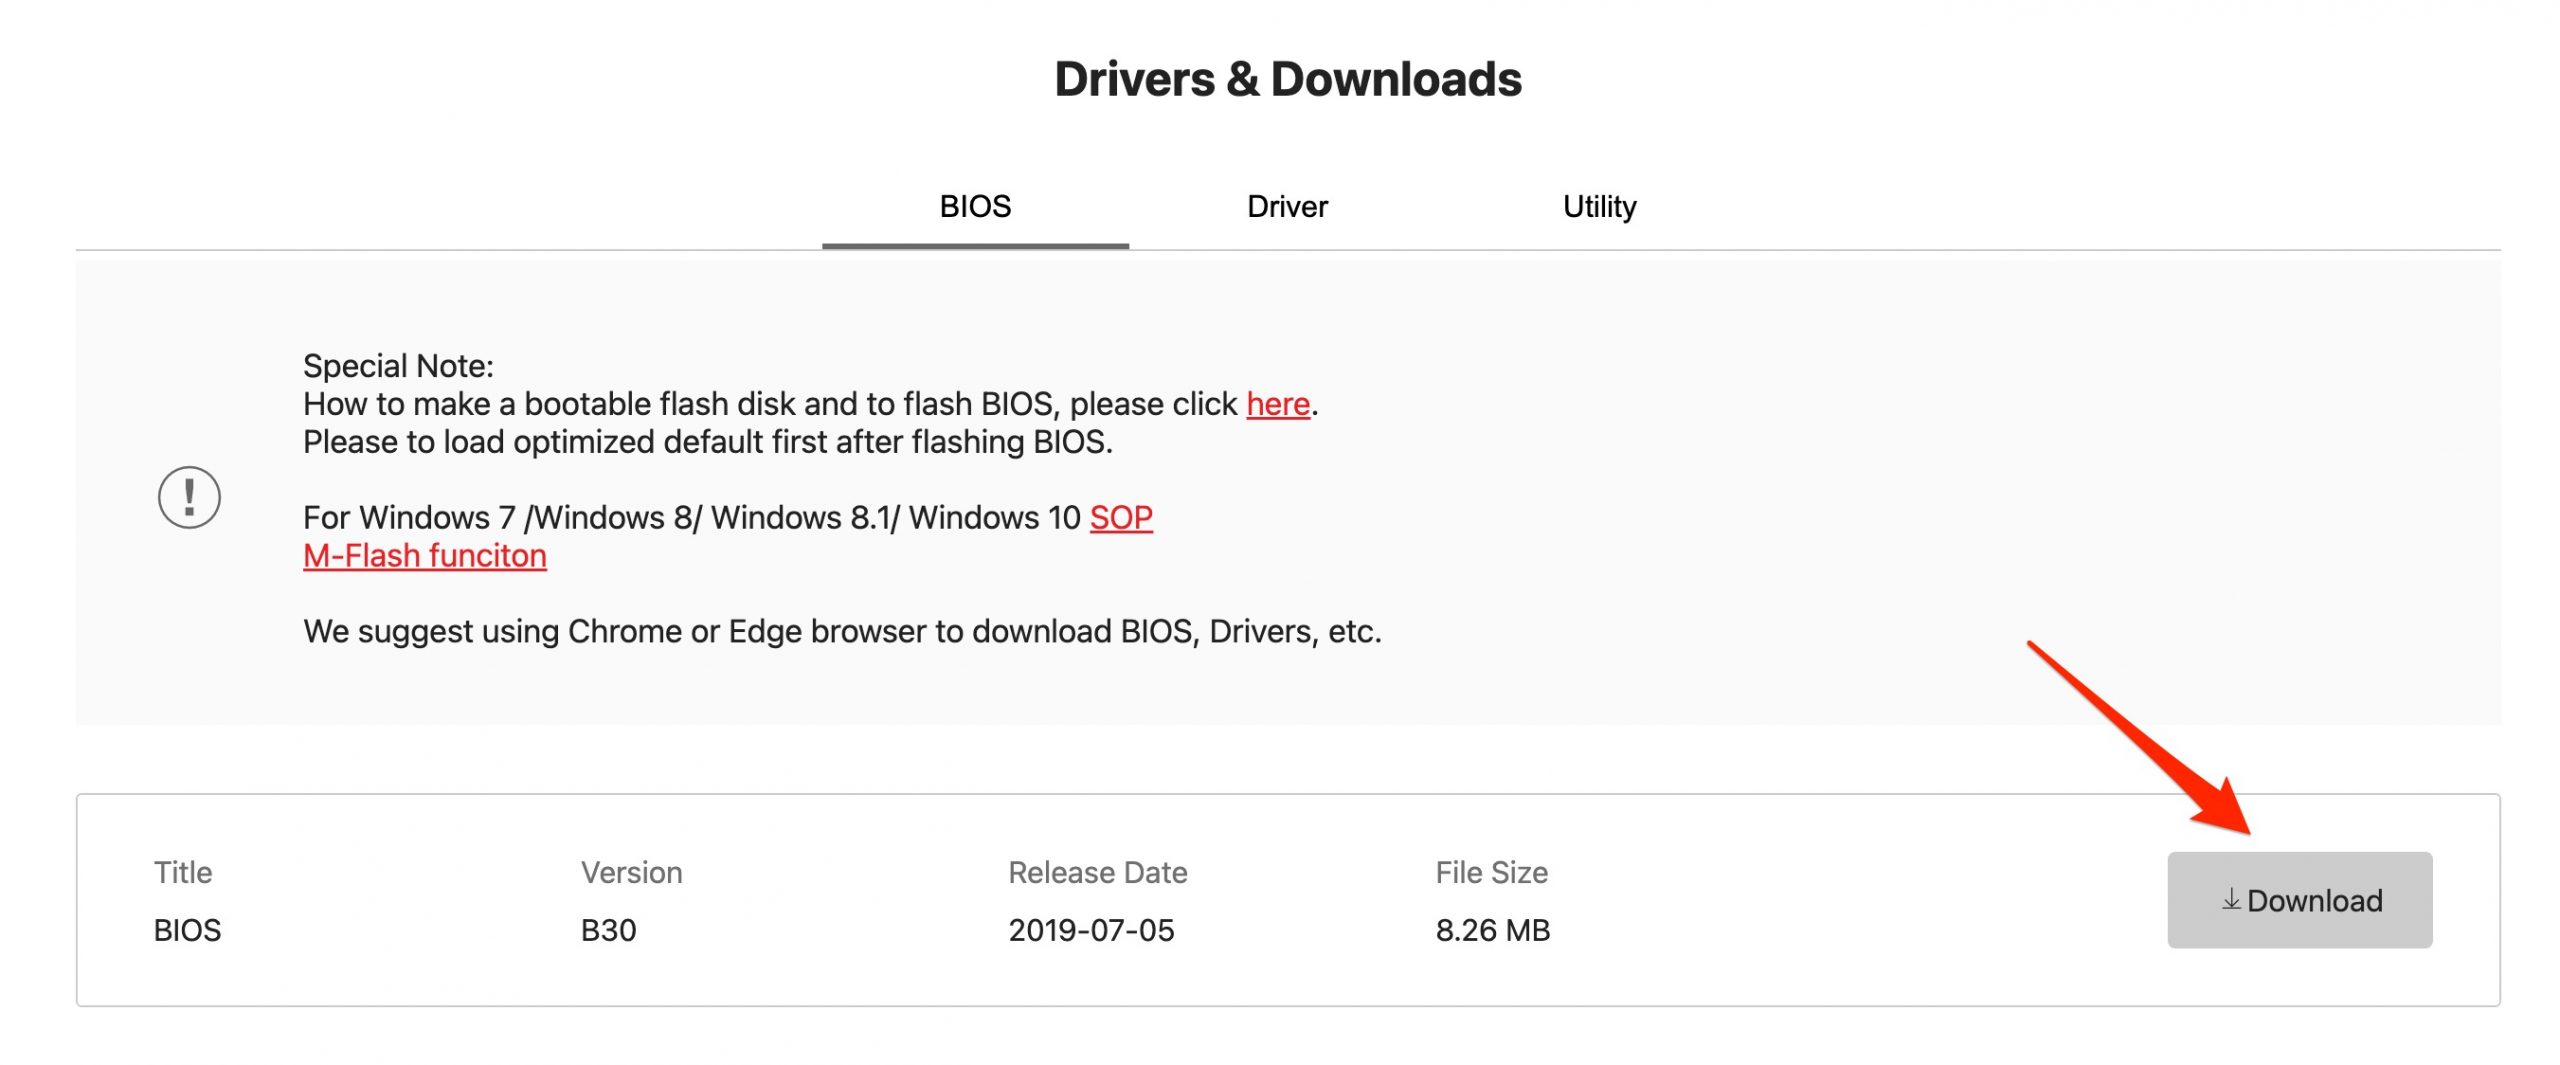
Step 1: Visit the official website or MSI using this link and click the search box in the right-hand corner. Type your motherboard model name and number and hit Enter. From the available search results, locate your BIOS model and click the download button.
Step 2: On the following window, Scroll down to “Drivers and Downloads“, Locate your required bios file and hit the download button to start downloading the update.
Step 3: Once the BIOS update file is downloaded on your computer. Visit the downloads folder, right-click on the zip file and select the “Extract zip file” option. When asked for the “Select the destination and extract files” option, click the browse button and select your USB flash drive as the destination and hit the extract button. Finally, Remove the USB Flash drive and restart your computer.
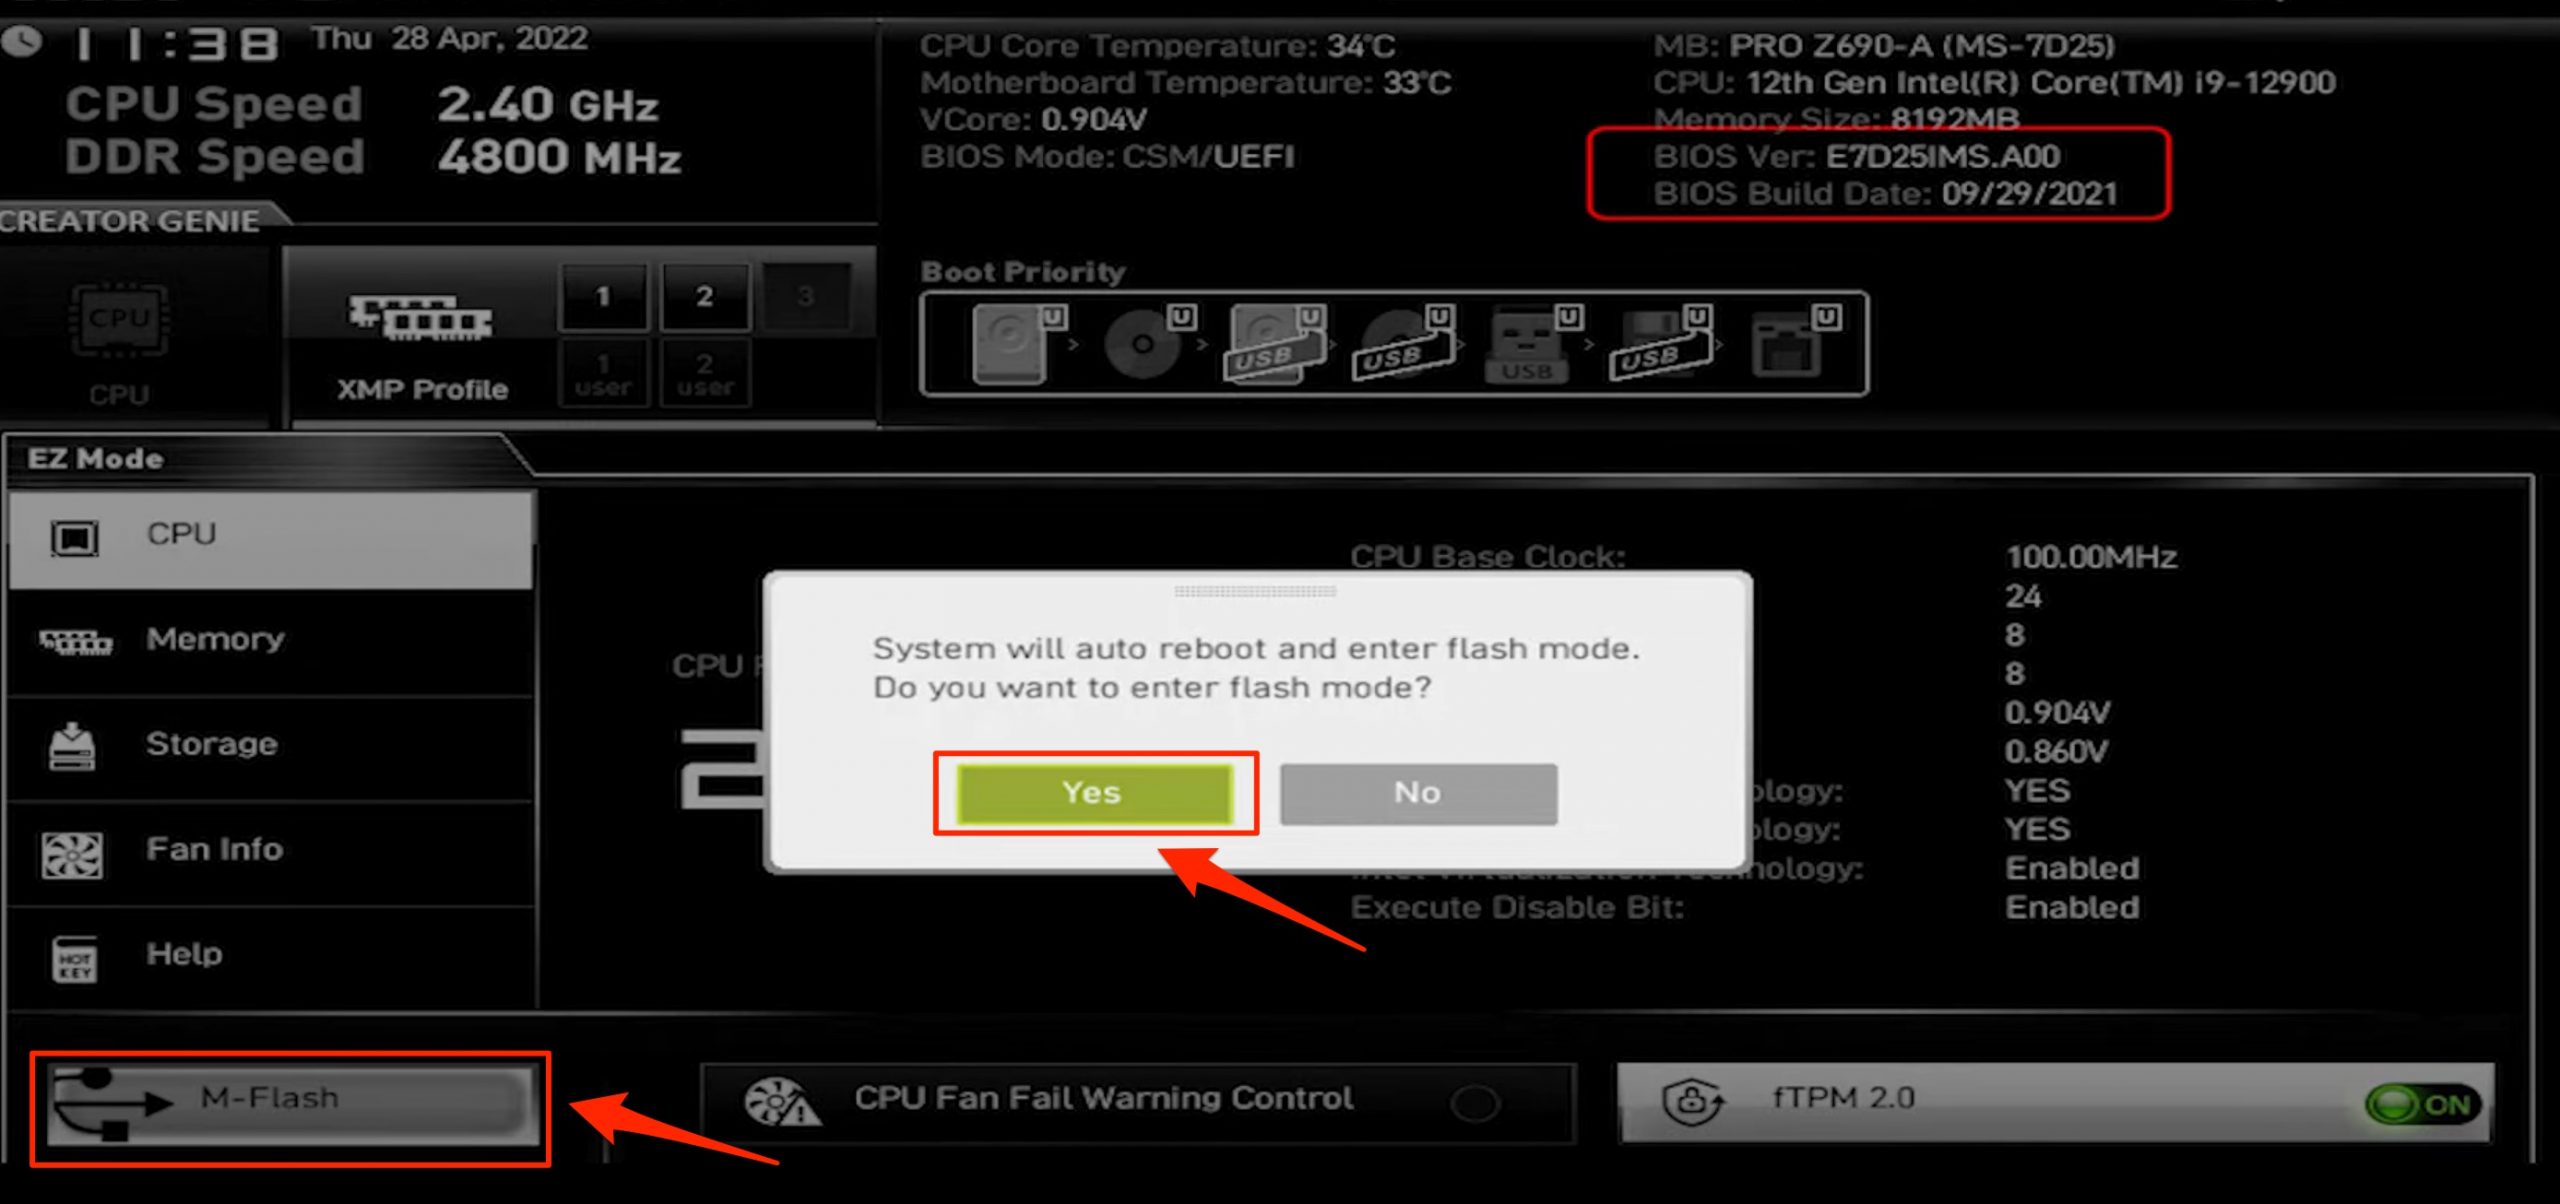
Step 4: Replug the USB flash drive and start your computer. To enter the BIOS menu, keep hitting the DELETE button on the restart screen until you see the BIOS menu.
Step 5: On the BIOS menu page, click the M-Flash option from the left side menu and click the “Yes” button when prompted.
Step 6: Under the “BIOS boot function” select the USB drive you just inserted and from the files option select the extracted BIOS update file click the “Yes” button to start the BIOS update.
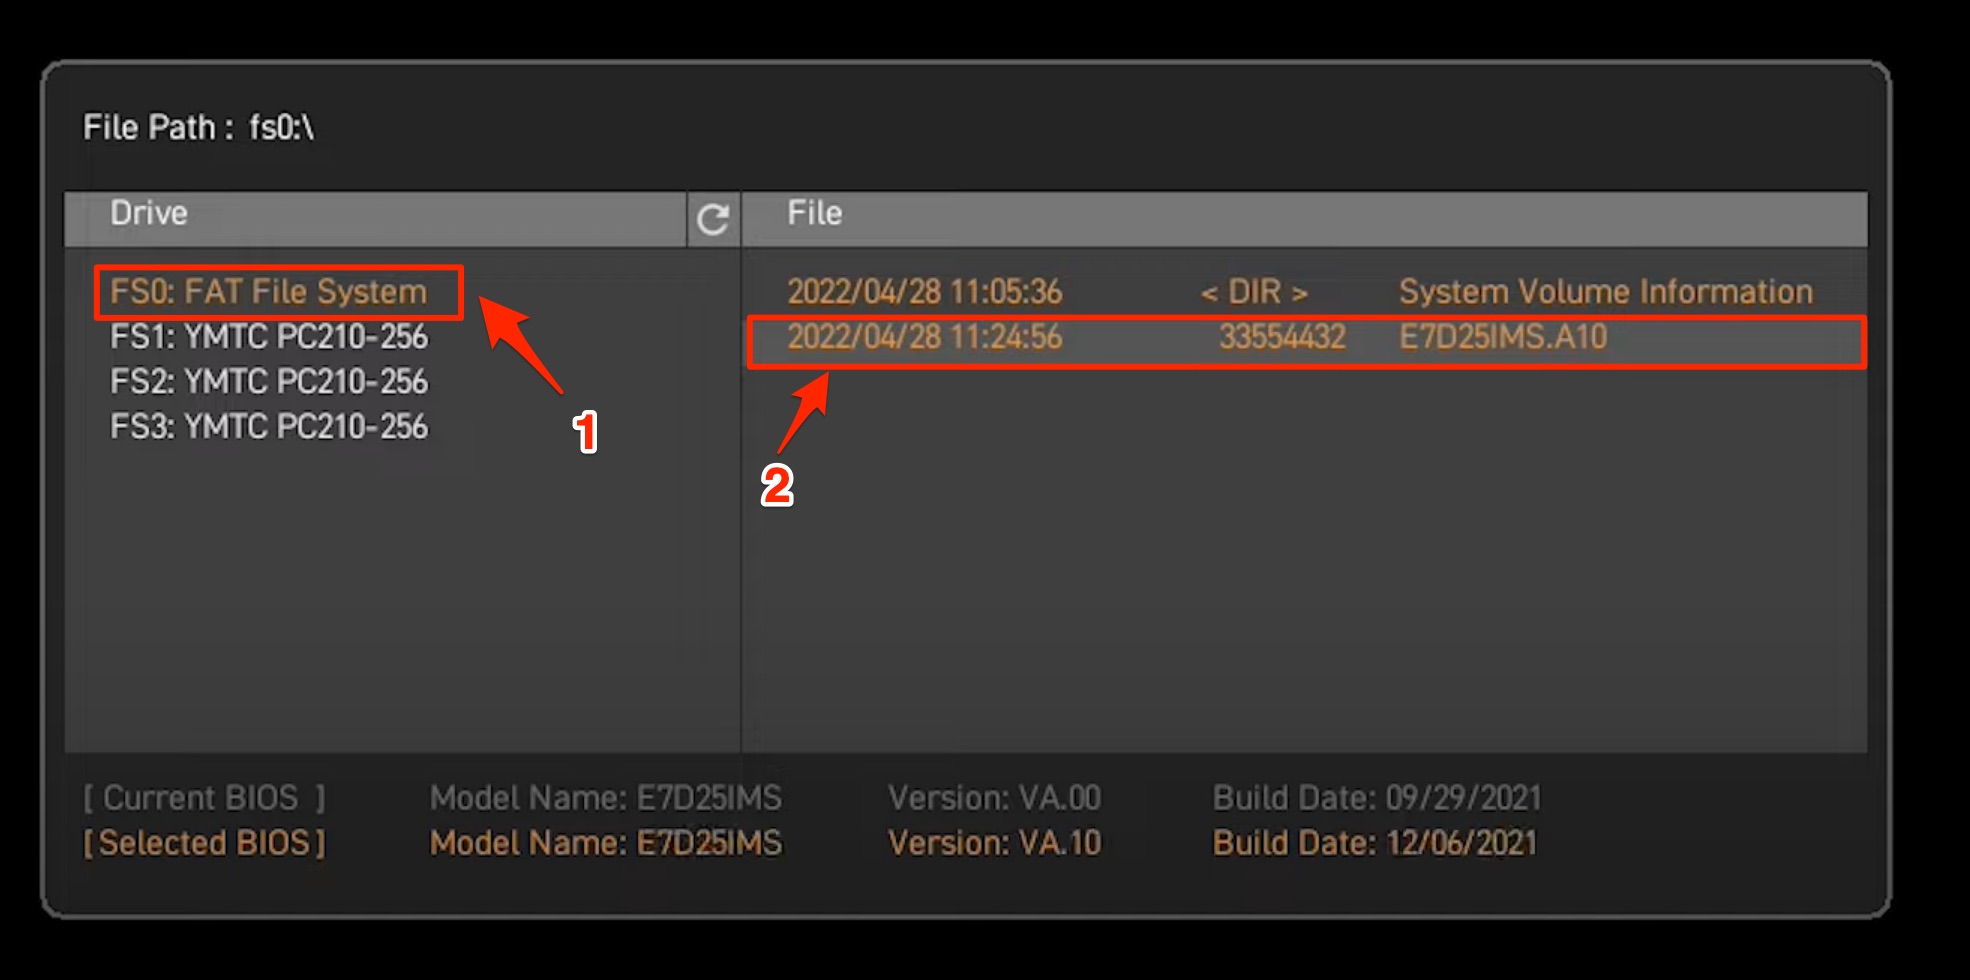
Step 7: Wait until the update is complete, your PC will restart automatically once the process is completed.
Final Words!
If you forgot your MSI BIOS administrator password then you have to unscrew your laptop/ Computer. By using the MSI Motherboard manual, locate jumper JBAT1 on your motherboard. remove the jumper from pin 1 and 2 and place it on jumper 2 and 3, Wait for at least half a minute and then change it back again to pin 1 and pin 2. This will reset the BIOS to default factory settings where the password will be removed.
Please let us know if you have any questions regarding the MSI Motherboard BIOS settings by commenting.